- MEMBRANE ROOF MOUNTING SYSTEM
E-Rail M
Alloy:
EN AW 6063 Aluminium
Layout:
Vertical / Horizontal
Mount:
Top Mount On The Ridge
Roof:
Trapezoidal And Sandwich Tile
Length:
Customizable Length
![](https://eraaluminyum.com.tr/wp-content/uploads/2023/12/erailm1.png)
![](https://eraaluminyum.com.tr/wp-content/uploads/2023/12/erailm2.png)
![](https://eraaluminyum.com.tr/wp-content/uploads/2023/12/erailm3.png)
Ease of Installation
Worldwide Supply Service
Eurocode Design Criteria
12 Years Warranty
Cost-Effective Solutions
CE ISO-9001 Certified
5 EASY STEPS TO INSTALL
![1erailm 1erailm](https://eraaluminyum.com.tr/wp-content/uploads/elementor/thumbs/1erailm-qgq16m80ay9uvdocetoa43zbramx4ixtfco0k81efw.png)
1. MOUNTING STEEL PLATE
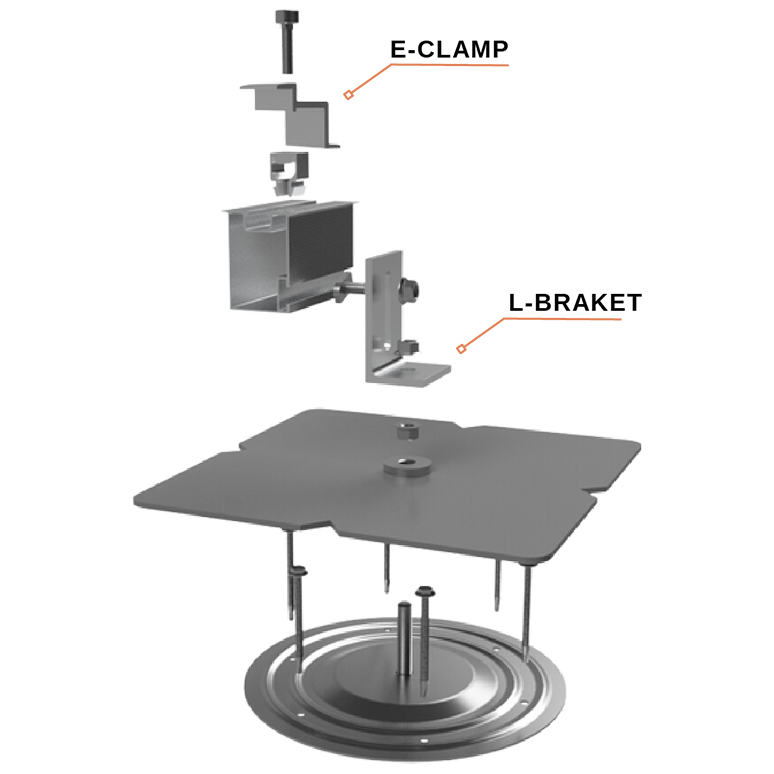
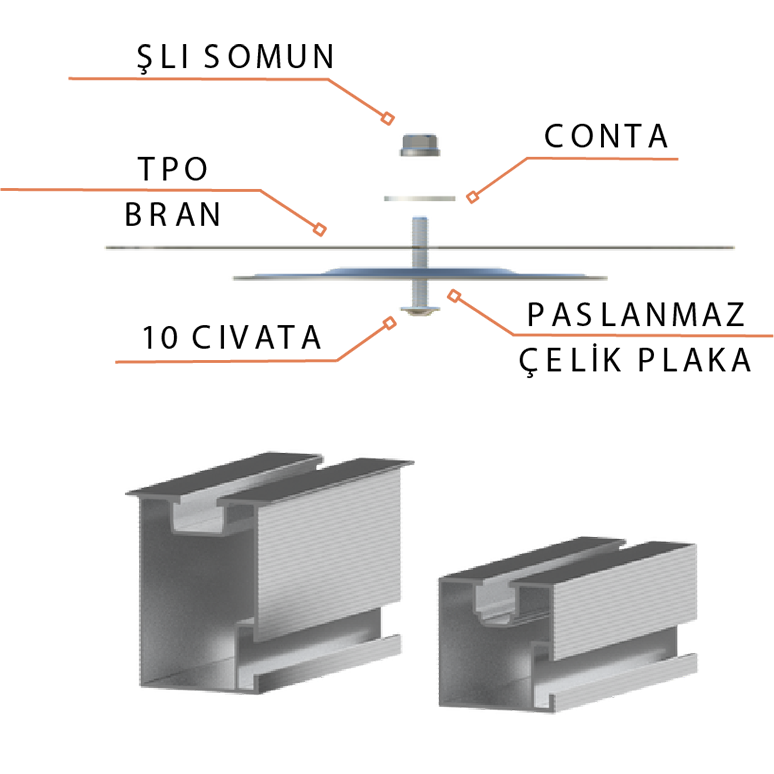
The stainless steel plate is mounted with 6 Membrane Screws.
2. MOUNTING PIECE OF MEMBRANE
The membrane piece is mounted to the pre-assembled steel plate. It is adhered to the existing membrane with the help of a heat gun and roller.
![2erailm 2erailm](https://eraaluminyum.com.tr/wp-content/uploads/elementor/thumbs/2erailm-qgq16la6448kjrppkb9njm7v5wrjwtu3380j2y2sm4.png)
![3erailm 3erailm](https://eraaluminyum.com.tr/wp-content/uploads/elementor/thumbs/3erailm-qgq16kcbxa7a85r2psv0z4gekiw6p4qcr3d1lo46sc.png)
3. MOUNTING L-BRACKET & T-BOLT & RAIL
L-Bracket is mounted to rod with flanged nut, T-Bolt & Flanged Nut are mounted to L-Bracket. The rail profile is mounted with T-Bolt fixed to the L- Bracket.
4. MOUNTING BOLT & NUT
The Clamp Set is pre-assembled and fixed to the rail profile with M8 Bolt.
![4erailm 4erailm](https://eraaluminyum.com.tr/wp-content/uploads/elementor/thumbs/4erailm-qgq16jehqg5zwjsfvageemoxz50thfmmeypk4e5kyk.png)
![5erailm 5erailm](https://eraaluminyum.com.tr/wp-content/uploads/elementor/thumbs/5erailm-qgq16hitcs3f9bv669n59n60sda321f5qpel5u8db0.png)
5. PLACEMENT OF PV PANEL
The pre-assembled clamp set is tightened at the appropriate torque values from the point recommended by the panel manufacturer.
Manual Guide