Laboratories
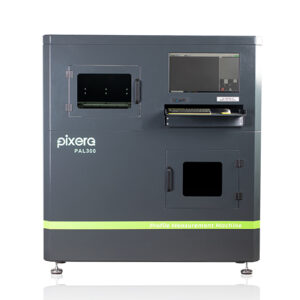
Pixera PAL300PRO
The device is capable of making precise measurements without being affected by environmental conditions such as temperature, dust, and vibration near our extrusion lines.
The Pixera PAL300PRO is a highly sensitive optical measurement device that enables fast quality control applications in our aluminum extrusion lines.
It is designed to quickly detect errors in the production process by combining state-of-the-art hardware with software applications.
With its one-click measurement feature, it prevents human errors and eliminates the risk of faulty production with its high-precision measurement capability.
All measurements are recorded using a data recording method, presenting the results in detail, generating a specific report for each measurement, thereby ensuring line traceability.

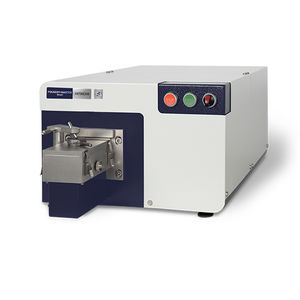
Optical Emission Spectrometer Device

It is the most common chemical analysis method used to determine the elemental composition of metals in different types of alloys.
The optical emission spectrometer performs precise and accurate analysis of 30 elements as standard in the iron and steel program, maintaining its performance without compromising long-term stable readings.
Once calibrated with the argon optical system, it continues to provide uninterrupted long-term stable readings 24/7.
In addition to its wide optical wavelength range, it can perform spectral analysis of many elements such as Iron, Silicon, Manganese, Copper, Sodium, Lithium, etc., in aluminum alloys.
Tensile Testing Machine
It ensures testing of product samples for proper fracture values and strength after production in samples with different characteristics.

Device Specifications:
The device utilizes Panasonic (Japan) AC Servo Control System and motor.
It features a sturdy body and a carrier bearing system.
Ideal for various tests such as tension, compression, bending, etc.
The device is entirely computer-controlled, ensuring reliable data transfer and control via a PCI card connected to the computer.
Automatic program control allows for the creation of any test environment.
The control software includes an automatic adjustment function.
Comprehensive graph features enable the plotting of all test curves, analysis, and comparison.
Extensive reporting capabilities
Software update capability
Overload protection
High precision with an accuracy of ±0.5%
Technical Specifications
Load Cell: High-resolution overload-protected force reader
Device Body: Aluminum alloy body
Beam: Thick and high-density structure ensures high precision throughout the test
Limit Switch: Restricts beam movement to ensure reliable control
Test Accessories: Easy and reliable interchangeability of test accessories
Servo Motor System: Fully digital AC driver and servo motor with balanced load transfer capability, low noise, and high efficiency
Photoelectric Encoder: High precision
Test Area: Wide test area capable of meeting all requirements
Manual Control: The device can independently move the beam up and down using a dedicated control panel if necessary.
Emergency Button: Disables all equipment of the device in case of a hazardous situation.
Software: User-friendly menus and functions
Control Card: Compatible with all computer and motherboard systems. Digital measurement system, load control, displacement, and deformation control, closed-loop control system
Brinell Hardness Measurement Device
A hardness measurement method based on measuring the diameter of an indentation formed on the material surface by pressing a ball of known diameter made of steel or tungsten carbide with a specific load and time.

Device Specifications:
Suitable for Rockwell hardness measurement of both ferrous and non-ferrous metals
Capability to convert between Rockwell, Brinell, and Vickers hardness scales
High-resolution large LCD display screen, ergonomic design, user-friendly
RS-232 Data Output
Automatic loading, load holding, and load removal
Loading: Automatic
Load selection: Manual with load dial
Application of load: Hydraulic (Automatic)
Loading time: 0-60 seconds
Standards: Compliant with BS EN ISO 6508, ISO 6598.2, and ASTM E18
Technical Specifications
| Preload | 98.1N (10kgf) |
| Total Load | 588.4N(60Kgf),980.7N(100Kgf),1471N(150kgf) |
| Rockwell Scales | (20-88), HRB(20-100), HRC(20-70), HRD (40-77), HRE (70-100), HRF (60-100), HRG (30-94), HRH (80-100), HRK (40-100), HRL (50-115), HRM (50-115), HRR (50-115) |
| Resolution | 0.1 Rockwell |
| Rockwell Max Specimen Height | 175mm |
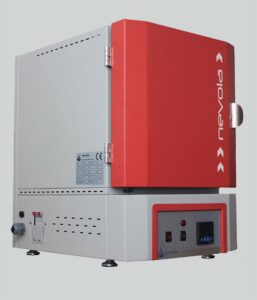
Ash Furnace
A type of jacketed enclosure used to significantly heat a material to high temperatures while completely isolating it from external pollutants, chemicals, or substances. It ensures thermal processing of a material subjected to an artificial aging method at the output of the aluminum extrusion line.
Technical Specifications:
The ash furnace found in the ERA Group Aluminum quality laboratory,
Operating temperatures are 1000˚C and 1100˚C, and they have laboratory furnaces with 3 lt. and 4 lt. internal volumes.
The heat chambers have a cellular structure. Thanks to their cellular structure, the resistors are kept in a closed area, protecting them from sample splashes and arcing.
User safety is prioritized in the furnace. The external surface temperature of the furnace is minimized by its insulation and ventilated structure, creating a safe working environment for the user.
The control device specially designed for our company is PID controlled, minimizing temperature fluctuations at the set value.
Delayed start and wait definitions can be specified up to 9999 minutes, and the program continues from where it left off in case of power outages.
