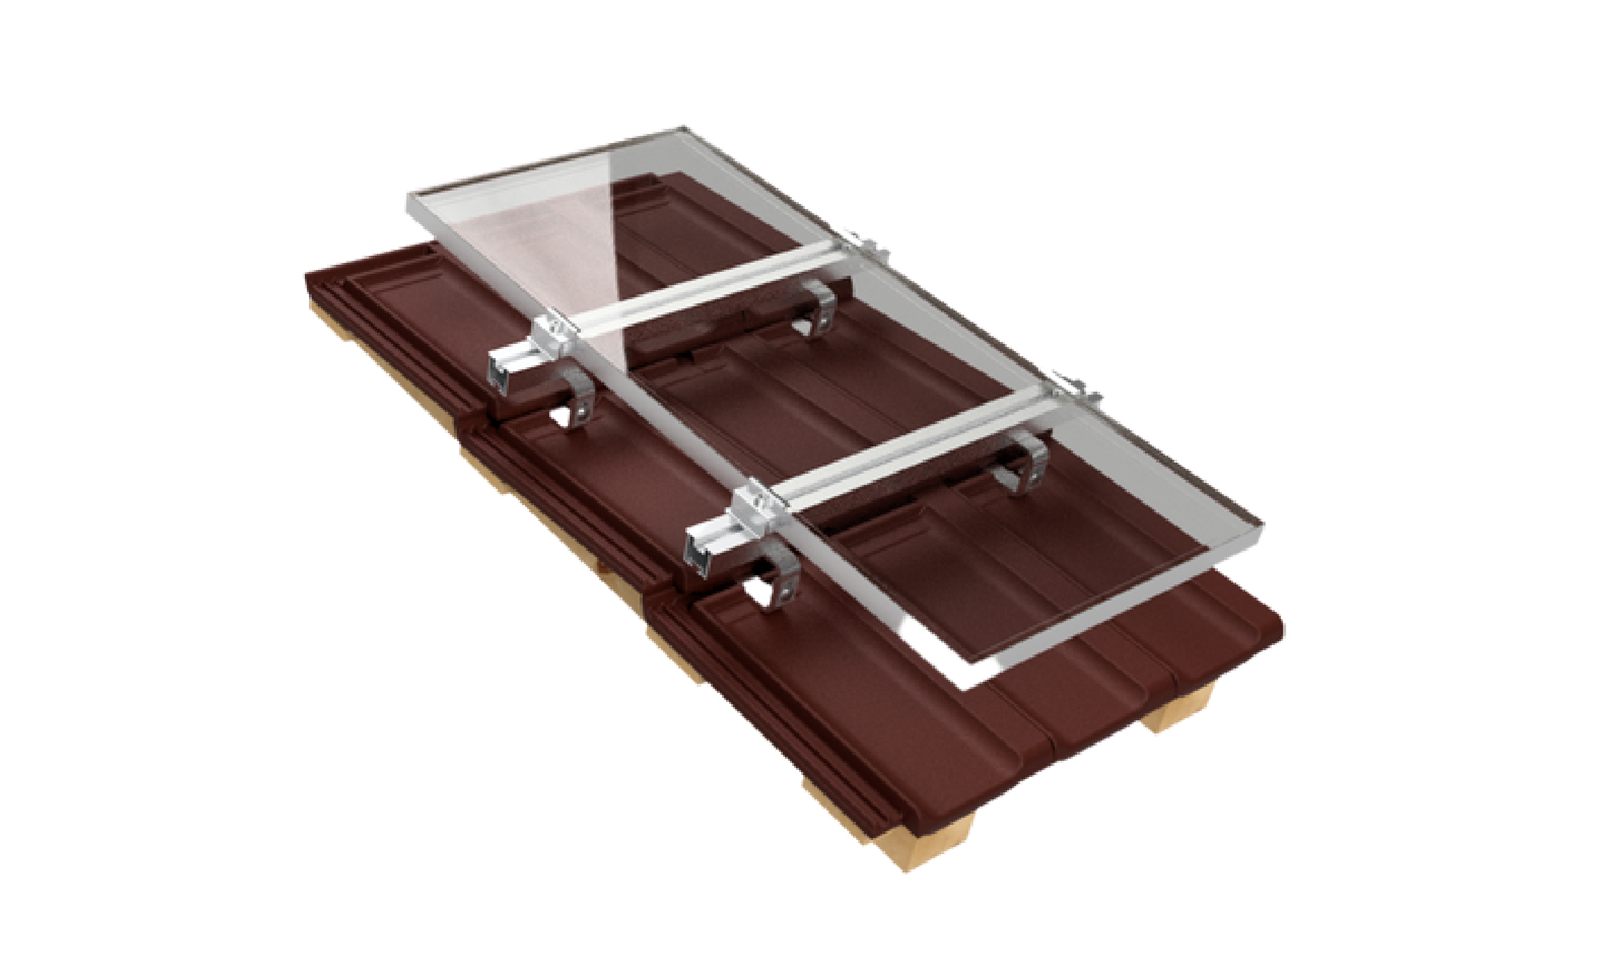
- TILE ROOF MOUNTING SYSTEMS
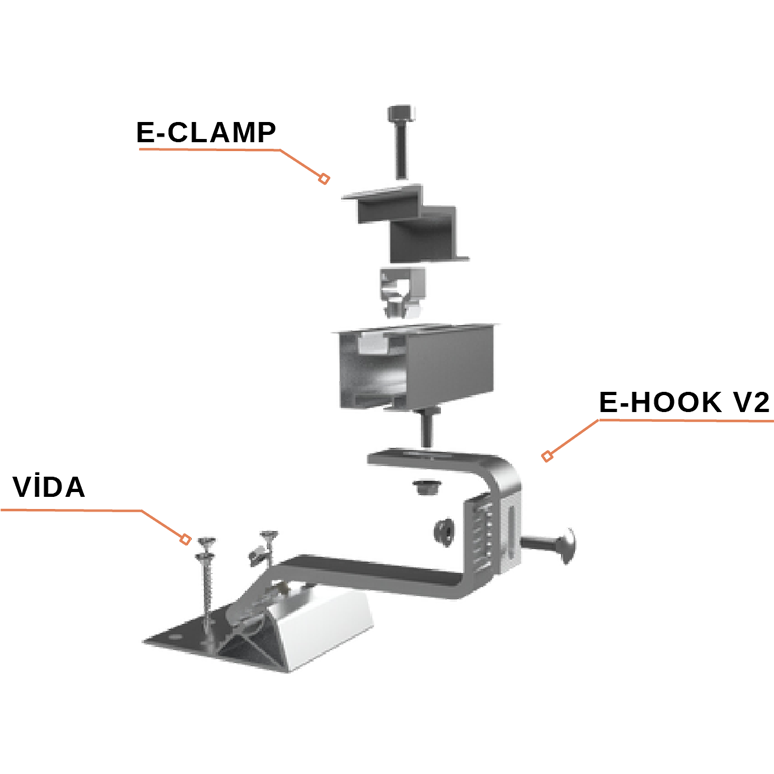
E-Hook V2 (Top Mount)
Alloy:
EN AW 6063 Aluminium
Layout:
Vertical / Horizontal
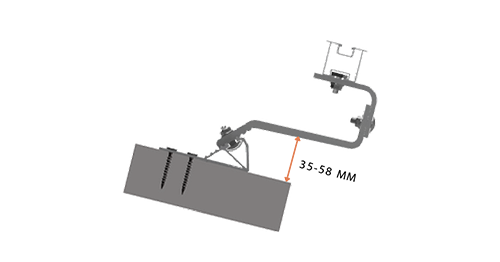
Height:
35-58 mm Adjustable
Roof:
Tile Roof
Length:
Customizable Length
Ease of Installation
Worldwide Supply Service
Eurocode Design Criteria
12 Years Warranty
Cost-Effective Solutions
CE ISO-9001 Certified
5 EASY STEPS TO INSTALL

1. SCREWING WITH WOOD SCREW
The lower part of the E-Hook is mounted to the tile roof purlins with Wood Screws.
2. MOUNTING MIDDLE PART OF HOOK
The middle part of the E-Hook is mounted to the lower part with Bumper Bolt. Another bumper bolt is mounted on the middle part.


3. MOUNTING RAIL PROFILE TO T-BOLT
The upper part of the E-Hook is mounted on the middle part. The rail profile is mounted on the E-Hook with a T-Bolt.
4. MOUNTING BOLT & NUT
The Clamp Set is pre-assembled and fixed to the rail profile with M8 Bolt.


5. PLACEMENT OF PV PANEL
The pre-assembled clamp set is tightened at the appropriate torque values from the point recommended by the panel manufacturer.
Manual Guide

