- FLAT ROOF MOUNTING SYSTEMS
Blast System
Alloy:
Layout:
Angle:
Roof:
Length:

Ease of Installation
Worldwide Supply Service
Eurocode Design Criteria
12 Years Warranty
Cost-Effective Solutions
CE ISO-9001 Certified
5 EASY STEPS TO INSTALL

1. MOUNTING CARRIER LEGS
The carrier legs of the system are mounted on the rail profile with T-Bolt & Flanged Nut.
2. MOUNTING OF RISER LEGS
The riser legs are mounted on the carrier legs to provide the planned angle according to the pv panel height. Pointed, Washer Screws are mounted in order to increase the rigidity of the system.


3. MOUNTING BOLT & CLAMP
The Clamp Set is pre-assembled and fixed to the rail profile with M8 Bolt.
4. PLACEMENT OF PV PANEL
The pre-assembled clamp set is tightened at the appropriate torque values from the point recommended by the panel manufacturer.


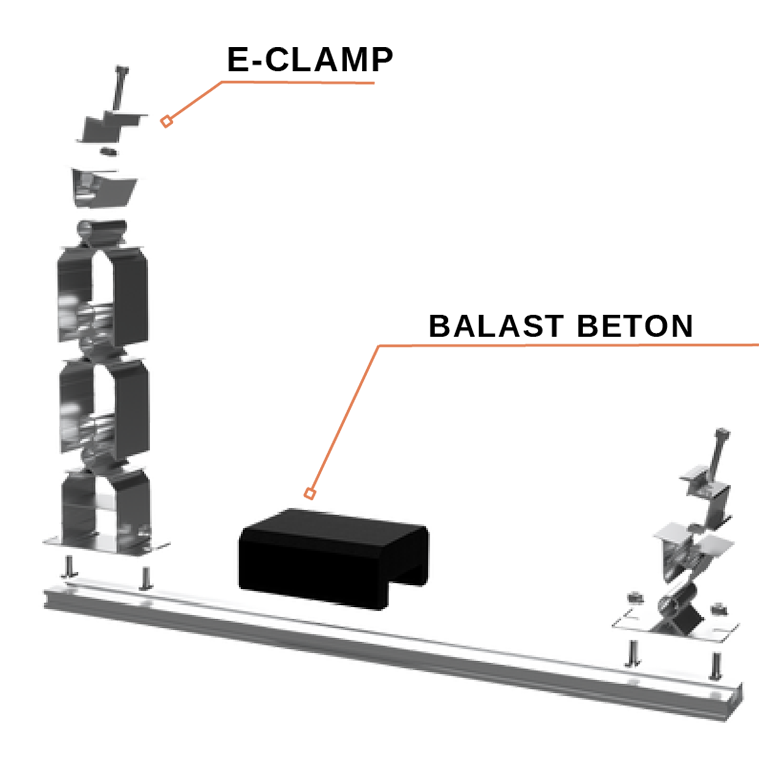
5. PLACEMENT OF BALLAST CONCRETE
After the system installation is completed, the balance concrete is placed on the rail profile to increase the resistance against mechanical loads such as wind.
Manual Guide

